 markdown6
Editing and preview
The three views, the toolbar, loading other Markdown files, the equation editor, outline and find, text size and width, settings, the macOS menu bar and keyboard shortcuts.
On this page
Three viewsThe toolbarLoad another Markdown fileEquation editorText size and widthLine numbers and VimAuto-saveSettingsThe macOS menu barKeyboard shortcuts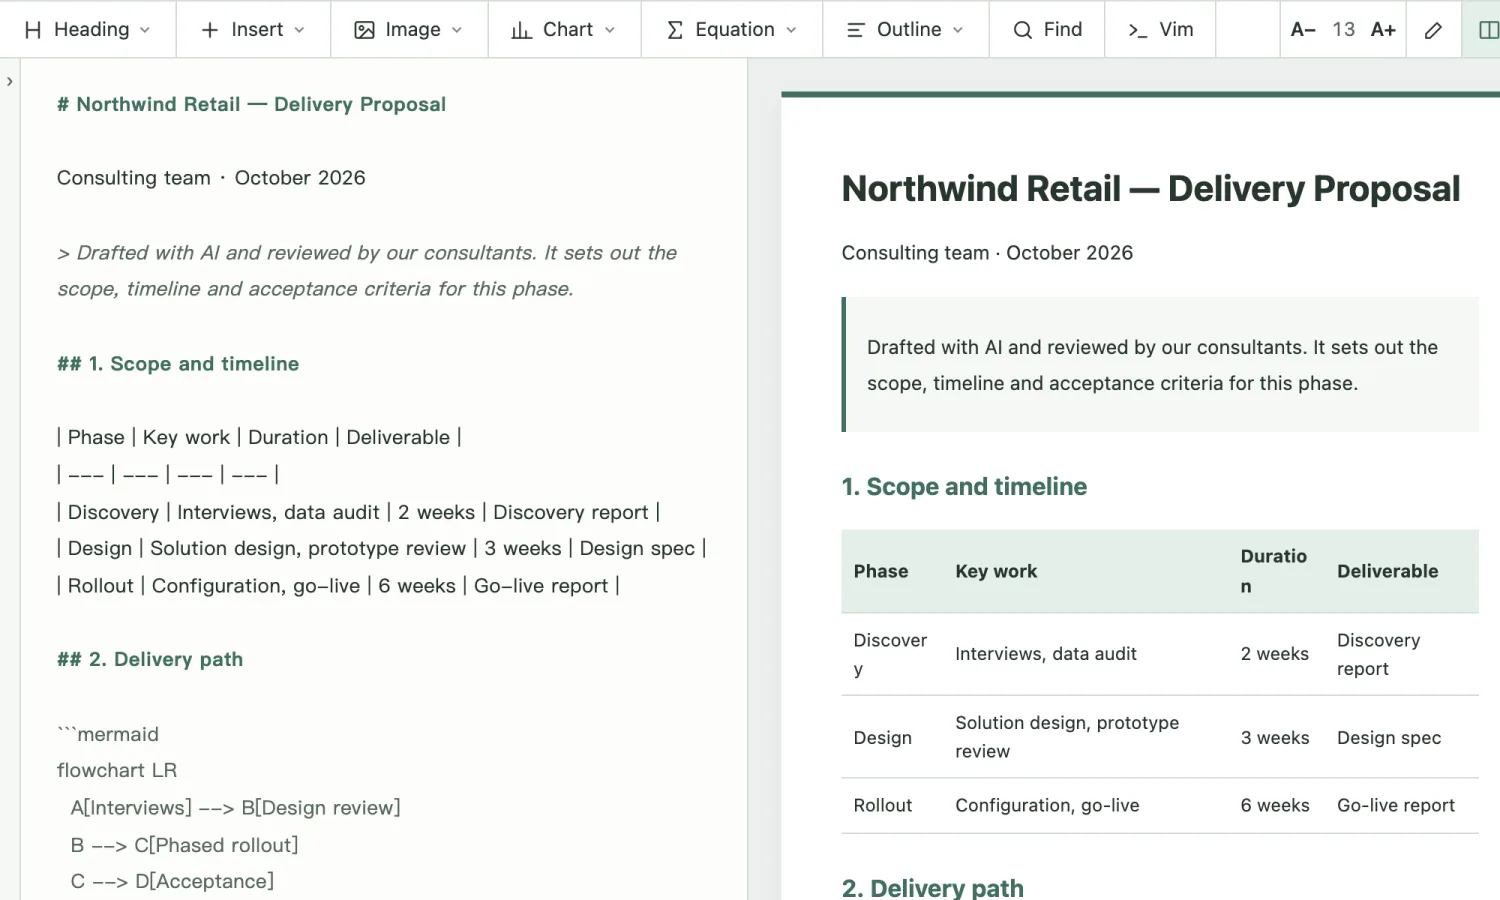
#Three views
Switch views at the right end of the toolbar:
| View | Best for | Shortcut |
|---|---|---|
| Edit | Focusing on the source | ⌘1 |
| Split | Writing on the left while the preview follows on the right | ⌘2 |
| Preview | Reading the result the way your client will | ⌘3 |
Press ⌘\ to hide or show the document list and give the editor more room. On Windows, use Ctrl instead of ⌘.
#The toolbar
| Button | What it does |
|---|---|
| Heading | Turns the current line into body text or a level 1–6 heading (it replaces existing # marks instead of adding more) |
| Insert | Bold, italic, strikethrough, bulleted and numbered lists, quote, link, code block, table, and Markdown file… |
| Image | Images from your computer or the web, and image size; see Images |
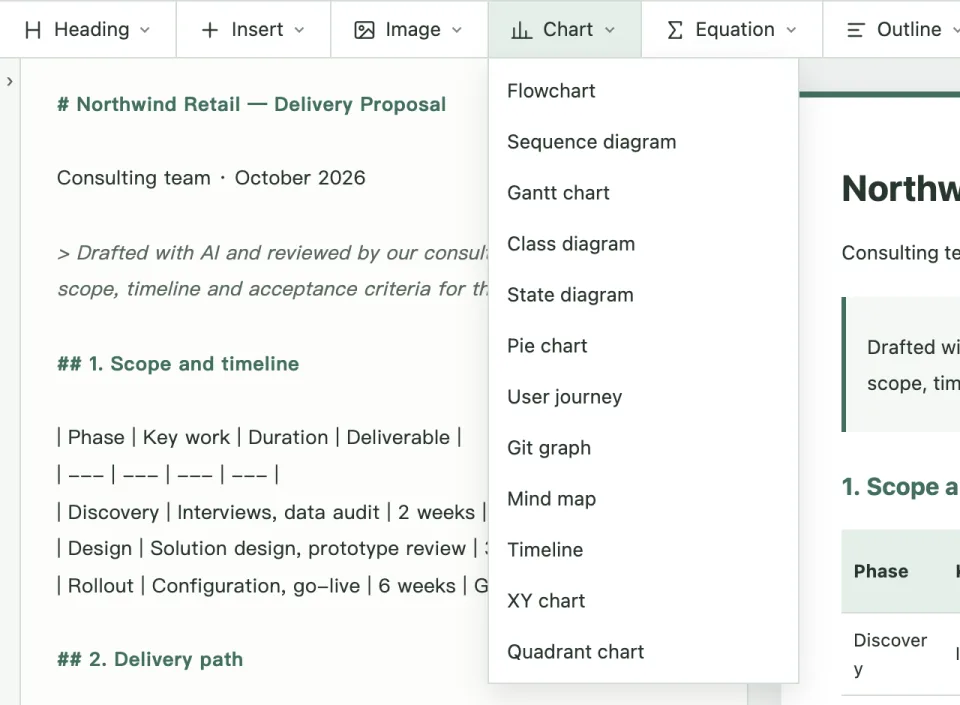
| Chart | Inserts one of 12 Mermaid chart templates |
| Equation | The equation editor, an inline equation or a display equation |
| Outline | Lists all headings; click one to jump there |
| Find | Finds text in the document, shows the number of matches, with previous and next |
| Vim | Turns Vim editing on or off |
Read-only documents (for example files that aren’t UTF-8) can’t use the Heading, Insert, Image, Chart or Equation menus.
#Load another Markdown file
To bring the contents of another .md file into the current document without opening and copying it:
- Drag it into the editor: drop a
.md(or.markdown,.txt) file on a line of the source and it is inserted after that line. Several files are inserted in order. - Insert › Markdown file…: pick a file and it is inserted at the cursor.
- In a blank document: a new blank document shows a Load Markdown file… button in the middle.
A blank new document simply becomes that file and is saved under its title; in a document that already has content, the file is inserted as one step you can undo. Local images the file refers to are copied into this document’s image folder and the links are updated; images that can’t be found keep their original reference and you’ll see a notice. A YAML front matter block isn’t inserted, and other text encodings are detected automatically. Each file can be up to 10 MB.
#Equation editor
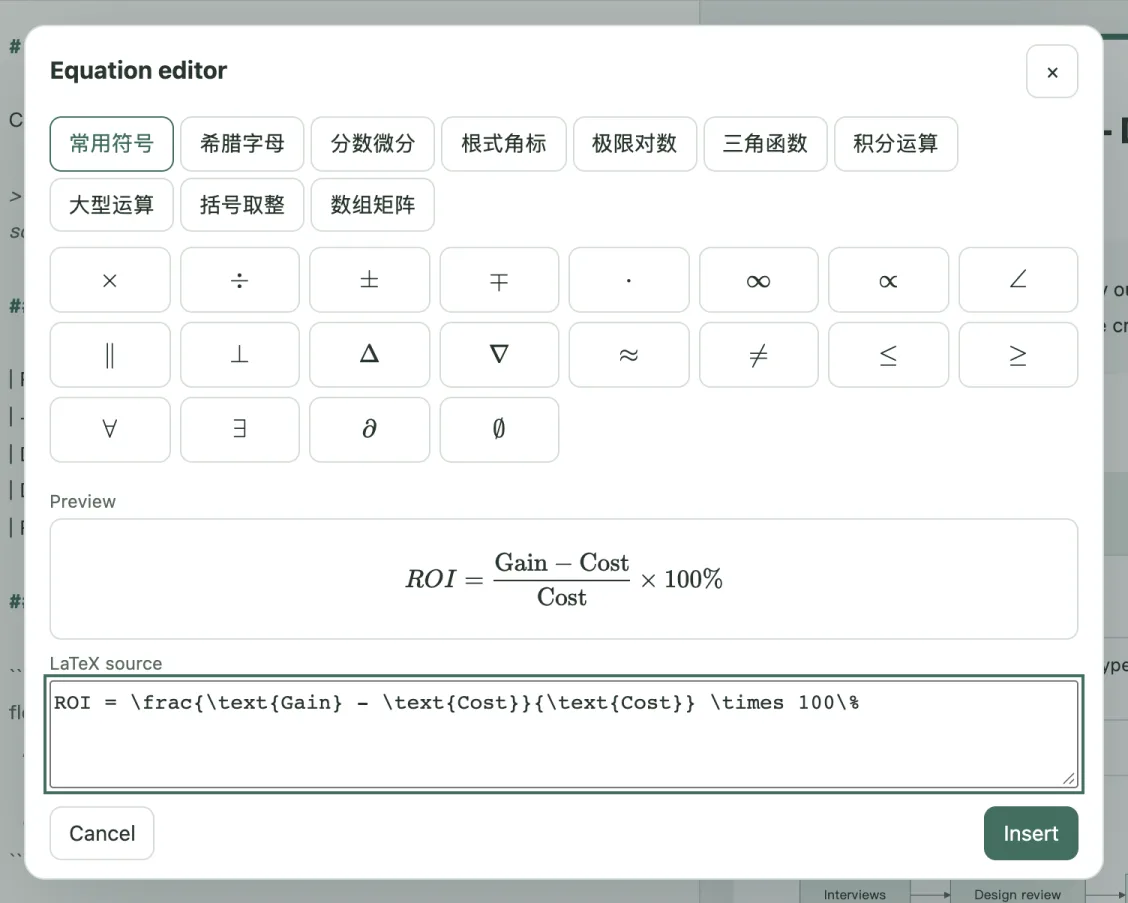
Equation › Equation editor… is for anyone who doesn’t know LaTeX by heart: pick symbols by category at the top, see a live preview below, or edit the LaTeX source directly, then click Insert. Multi-line equations are inserted as display equations.
For the syntax, see Supported Markdown › Math.
#Text size and width
- Use A− and A+ at the right of the toolbar to change the text size (12–20); click the number to reset it. You can also press ⌘= / ⌘- / ⌘0.
- In Preview, choose the content width: Narrow, Default, Wide or Full width.
Text size and width only change how things look on this computer. They aren’t saved in the document and don’t affect exports.
#Line numbers and Vim
- Line numbers are hidden by default. To show them, turn on Show line numbers in Settings › General › Editor (on macOS, you can also use View › Line numbers in the menu bar).
- With Vim on, the editor works the Vim way. On Windows, Ctrl+O / N / W / F go to Vim; Ctrl+S always saves.
#Auto-save
Auto-save is on by default: markdown6 saves about 2 seconds after you stop typing, and the status bar shows the save state and word count. To save by hand, turn off Auto-save in Settings › General; then press ⌘S, and a Save button appears in the top bar.
if the file is changed by another app, markdown6 pauses auto-save for that document and asks what to do; see Documents › When a file changes outside markdown6.
#Settings
Click the gear in the bottom-right corner of the status bar (Settings & help), or press ⌘, to open Settings:
| Tab | What’s there |
|---|---|
| General | Language (follow system, Chinese or English); auto-save; whether closing the window keeps markdown6 running in the background; making markdown6 the default app for .md files |
| Library | Where your Documents folder is (show in folder, copy path, change location); project folders and Add project folder… |
| Privacy | Anonymous usage statistics (the international edition doesn’t send them yet) |
The gear menu also has User guide, Keyboard shortcuts, Check for updates… and About markdown6. Changes apply right away.
#The macOS menu bar
On macOS, the menu bar lists every command with its shortcut: markdown6 · File · Edit · Format · Insert · View · Sync · Window · Help. They do the same things as the buttons in the window. Unavailable commands are dimmed, and checkmarks show which view, document list, line numbers, Vim and auto-sync settings are on. File › Open recent opens your last 5 documents.
#Keyboard shortcuts
| Action | macOS | Windows |
|---|---|---|
| New / Open | ⌘N / ⌘O | Ctrl+N / Ctrl+O |
| Save / Save as | ⌘S / ⌘⇧S | Ctrl+S / Ctrl+Shift+S |
| Export | ⌘⇧E | Ctrl+Shift+E |
| Edit / Split / Preview | ⌘1 / ⌘2 / ⌘3 | Ctrl+1 / Ctrl+2 / Ctrl+3 |
| Show or hide the document list | ⌘\ | Ctrl+\ |
| Larger / smaller / reset text | ⌘= / ⌘- / ⌘0 | Ctrl+= / Ctrl+- / Ctrl+0 |
| Bold / italic | ⌘B / ⌘I | Ctrl+B / Ctrl+I |
| Undo / redo | ⌘Z / ⌘⇧Z | Ctrl+Z / Ctrl+Y |
| Find / next / previous | ⌘F / ⌘G / ⌘⇧G | Ctrl+F |
| Body text / heading 1–6 | ⌥⌘0 / ⌥⌘1–6 | — |
| Insert link | ⌘K | — |
| Settings | ⌘, | Ctrl+, |
| Close window | ⌘W | — |
| Keyboard shortcuts | ⌘/ | Ctrl+/ |
In the editor, Tab and Shift+Tab indent and outdent. Menus, the image size bar and the zoomed image view all close with Esc.
Still stuck? Email support@miniidealab.com.